Back for round badges with mounted needle
Add these complementary products to your cart
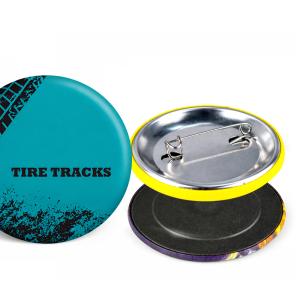
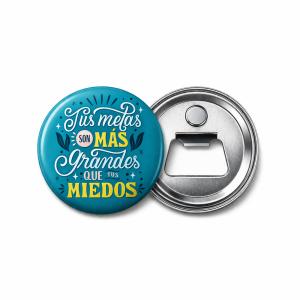
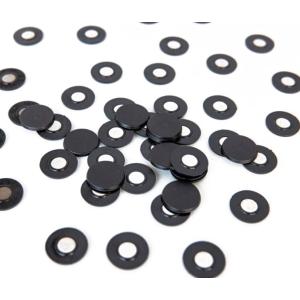
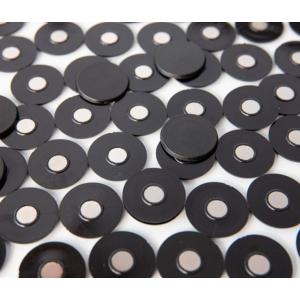
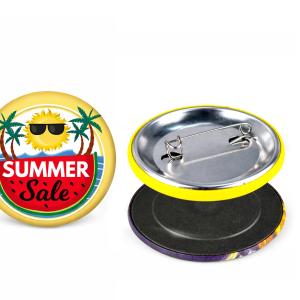
The Back for round badges with mounted needle is the back piece consumable for mounting the round badges. High-quality pieces to achieve a professional finish. Along with the polyester film and the front side, and using these parts with any of the Button badge making machines B-700, B-500 or B-150, you can mount a custom badge in seconds.
Also purchased separately:
- Polyester film for round badges.
- Front side for round badges.
Button badges are widely used in marketing campaigns, as souvenirs in family events and in sporting or political events, or simply as decorative elements. Due to their low production cost, they are an effective and economical element for all types of advertising.
- Shape
- Round
- Badge size
- Ø 31 mm
Ø 38 mm
Ø 59 mm
Machine Compatibility:
Machine | Compatible sizes | Interchangeable Molds | Cutting tool | Badges | Magnets |
---|---|---|---|---|---|
B-900s | 78 x 53 mm | Paper punch-cutter rectangular | |||
B-700 | Ø59 mm | Mold Ø59 mm | Paper cutter CM-500 | ||
Ø50 mm | Mold Ø50 mm | ||||
Ø38 mm | Mold Ø38 mm | ||||
Ø31 mm | Mold Ø31 mm | ||||
Ø25 mm | Mold Ø25 mm | ||||
B-500 | Ø75 mm | Paper cutter CM-500 | |||
Ø59 mm | |||||
Ø50 mm | |||||
Ø38 mm | |||||
Ø31 mm | |||||
Ø25 mm | |||||
B-150 | Ø59 mm | Paper cutter CM-500 | |||
Ø38 mm |
Compatibility according to Printable Area:
Printable area | Machine | Cutting tool | Badges | Magnets |
---|---|---|---|---|
Ø25 mm | B-700 | Paper cutter CM-500 | ||
B-500 | ||||
Ø31 mm | B-700 | Paper cutter CM-500 | ||
B-500 | ||||
Ø38 mm | B-700 | Paper cutter CM-500 | ||
B-500 | ||||
B-150 | ||||
Ø50 mm | B-700 | Paper cutter CM-500 | ||
B-500 | ||||
Ø59 mm | B-700 | Paper cutter CM-500 | ||
B-500 | ||||
B-150 | ||||
Ø75mm | B-500 | Paper cutter CM-500 | ||
78 x 53 mm | B-900s | Paper punch-cutter rectangular |
Create custom magnets and badges:
- Printing:
- Select the design you want to print. It can be a logo, a text, an image or a photograph, or a combination of these.
- It is recommended to use a design program to create templates according to the size of the badge or magnet. The template can include guide lines to facilitate cutting and assembly.
- Remember to leave a paper edge, which will bend to hold onto the back of the badge or magnet.
- Print the design on paper, using your usual printer.
- Cutting:
- To cut the paper to the correct size and shape it is recommended to use a cutter or die cutter of the size that corresponds to the badge or magnet you want to create.
- Place the paper in the chosen cutter so that the design is exactly centered in the cutter's viewing window.
- Depending on the cutter used, cut the paper.
- The paper is ready to mount on the badge or magnet.
- Assembly:
- Place the front piece of the badge or magnet in the mold 1 of the machine. If you are using the B-150, you must first place the supplied metal washer in the lower mold.
- Lay the paper with the design exposed on top of the front piece.
- Cover the paper with a piece of polyester of the corresponding size.
- Rotate the blue base until it stops, so that mold 1 is positioned underneath the upper mold. If using the B-150 machine, place the upper mold in position 1.
- Pull the lever until it stops. The front of the badge or magnet is now ready and will remain in the upper mold.
- Place in the lower mold 2, the selected back part according to the type of badge or magnet that you want to mount. In the case of the B-150 machine, you must first remove the meal washer from the lower mold.
- The side with the needle, magnet, bottle opener, etc., will be facing down inside mold 2, and will not be visible at the moment.
- Turn the blue base until mold 2 is underneath the upper mold. In the case of the B-150 machine, you will need to place the upper mold in position 2.
- Pull the lever as far as it will go, then return it to the normal position.
- Rotate the base again to remove the finished product.
Customers who bought this product also bought:
