Sublimet
Sticker
Paper punch-cutter for rectangular magnets and badges

Paper punch-cutter for rectangular magnets and badges

(5)
(0)

€132.00 Price excludes VAT

€159.72 Price includes VAT

Preparation 2/3 working days

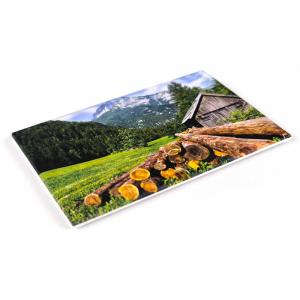
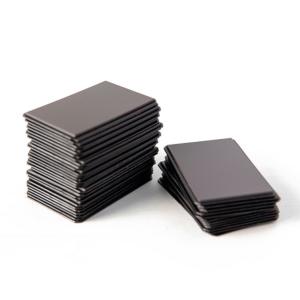
The Paper punch-cutter for rectangular magnets and badges is a rectangular paper cutter used to cut out designs for fridge magnets or personalized 78 x 53 mm badges. It has a viewing window that allows you to view the design, to center it and cut the designs with great precision. This cutting die is very fast and easy to use. The cuts are clean leaving the paper ready to mount on the badge or magnet. It is the ideal complement to the Rectangular magnet and badge maker machine B-900S.

Main Features:

  • Visualization: Has a wide window to center the design and cut precisely.
  • Cut one design at a time. Suitable for cutting a sheet of paper up to 150 gr.
  • Quick and easy:The paper is ready to be mounted on the badge or magnet.
  • Cut size: single, for magnets or badges of 78 x 53 mm. The tool cuts the design slightly larger than the specified size, as the edge of the paper will bend to grip the back of the badge or magnet.
  • Compatibility: to mount magnets or badges of 78 x 53 mm with the Rectangular magnet and badge maker machine B-900S.
 

How to use:

  1. Print the design on paper, using your regular printer. Remember to leave a paper edge, which will bend to hold onto the back of the badge or magnet.
  2. Position the paper so that the design is centered exactly in the viewing window.
  3. Slide the lever down, exerting slight pressure.
  4. The design is ready to mount on the badge or magnet.
Product dimensions
22 x 20 x 26,5 cm
Weight
4,3 Kg
Shape
Rectangular
Badge size
78 x 53 mm
133030002
09CTMS
Sticker
Sticker
Fridge magnets 78 x 53 mm IM-7853 Fridge magnets 78 x 53 mm IM-7853 2
  • Pack
  • Out-of-Stock
Out-of-Stock
Sticker
Badge paper cutter CM-500 Badge paper cutter CM-500 2
Last items in stock
Sticker
Sticker
Sticker
Front side for magnets 78 x 53 mm Front side for magnets 78 x 53 mm 2
  • Out-of-Stock
Out-of-Stock
Sticker
Back side to magnets 78 x 53 mm Back side to magnets 78 x 53 mm 2
  • Out-of-Stock
Out-of-Stock
Sticker

Create custom magnets and badges:

  1. Printing:
    • Select the design you want to print. It can be a logo, a text, an image or a photograph, or a combination of these.
    • It is recommended to use a design program to create templates according to the size of the badge or magnet. The template can include guide lines to facilitate cutting and assembly.
    • Remember to leave a paper edge, which will bend to hold onto the back of the badge or magnet.
    • Print the design on paper, using your usual printer.
  2. Cutting:
    • To cut the paper to the correct size and shape it is recommended to use a cutter or die cutter of the size that corresponds to the badge or magnet you want to create.
    • Place the paper in the chosen cutter so that the design is exactly centered in the cutter's viewing window.
    • Depending on the cutter used, cut the paper.
    • The paper is ready to mount on the badge or magnet.
  3. Assembly:
    • Place the front piece of the badge or magnet in the mold 1 of the machine. If you are using the B-150, you must first place the supplied metal washer in the lower mold.
    • Lay the paper with the design exposed on top of the front piece.
    • Cover the paper with a piece of polyester of the corresponding size.
    • Rotate the blue base until it stops, so that mold 1 is positioned underneath the upper mold. If using the B-150 machine, place the upper mold in position 1.
    • Pull the lever until it stops. The front of the badge or magnet is now ready and will remain in the upper mold.
    • Place in the lower mold 2, the selected back part according to the type of badge or magnet that you want to mount. In the case of the B-150 machine, you must first remove the meal washer from the lower mold.
    • The side with the needle, magnet, bottle opener, etc., will be facing down inside mold 2, and will not be visible at the moment.
    • Turn the blue base until mold 2 is underneath the upper mold. In the case of the B-150 machine, you will need to place the upper mold in position 2.
    • Pull the lever as far as it will go, then return it to the normal position.
    • Rotate the base again to remove the finished product.

Machine Compatibility:

MachineCompatible sizesInterchangeable MoldsCutting toolBadgesMagnets
B-900s 78 x 53 mm Paper punch-cutter rectangular
B-700 Ø59 mm Mold Ø59 mm Paper cutter CM-500
Ø50 mm Mold Ø50 mm
Ø38 mm Mold Ø38 mm
Ø31 mm Mold Ø31 mm
Ø25 mm Mold Ø25 mm
B-500 Ø75 mm Paper cutter CM-500
Ø59 mm
Ø50 mm
Ø38 mm
Ø31 mm
Ø25 mm
B-150 Ø59 mm Paper cutter CM-500
Ø38 mm

Compatibility according to Printable Area:

Printable areaMachineCutting toolBadgesMagnets
Ø25 mm B-700 Paper cutter CM-500
B-500
Ø31 mm B-700 Paper cutter CM-500
B-500
Ø38 mm B-700 Paper cutter CM-500
B-500
B-150
Ø50 mm B-700 Paper cutter CM-500
B-500
Ø59 mm B-700 Paper cutter CM-500
B-500
B-150
Ø75mm B-500 Paper cutter CM-500
78 x 53 mm B-900s Paper punch-cutter rectangular

Write your review

Paper punch-cutter for rectangular magnets and badges

Write your review

Customers who bought this product also bought:

Product added to wishlist
Product added to compare.